Welcome to our quick guide to getting started with Arduino! If you’re new to the world of electronics and programming, you might be feeling a little overwhelmed by all the different options and tools available to you. That’s where Arduino comes in. It’s a simple and user-friendly platform that allows you to create your own interactive projects with just a little bit of coding knowledge.
In this beginner’s tutorial, we’ll take you through these 7 steps:
This course will take you through the fundamentals of Arduino programming step-by-step, with hands-on projects and expert guidance. But for now, let’s get started with our quick guide to Arduino!
Step 1: Understanding Arduino's Capabilities
If you’re new to electronics and programming, Arduino might seem like a complex platform to learn. But with a little bit of research and practice, you can quickly gain a solid understanding of its capabilities and start creating your own projects.
To start, it’s important to focus on the basics. Learn what Arduino is and how it works by exploring beginner-friendly resources (such as books, online courses, or tutorials) that explain the concepts clearly and provide examples to help you get started. This will help you get a feel for the platform and what it can do.
Next, take some time to familiarize yourself with the various components that you can use with Arduino, such as sensors, motors, and displays. By doing so, you’ll be able to understand what kind of projects you can create with the platform and what components you need to get started.
Step 2: Getting an Arduino Starter Kit
An Arduino starter kit is a great investment for anyone who’s interested in learning about the platform. These kits include all the essential components you need to get started, such as an Arduino microcontroller board, a USB cable, and other beginner-friendly components. Many kits also come with instructional materials or project ideas to help you get started.
With so many different starter kits available, it’s important to choose one that fits your needs and budget. Look for a kit that includes the components you need to get started with basic projects, such as controlling LEDs and reading sensors. If you have a specific project in mind, such as robotics or home automation, look for a kit that includes components specific to that area.
When choosing an Arduino starter kit, it’s also important to consider the quality of the components included in the kit. Cheaper kits may include lower quality components that are more prone to failure or may not work as well as higher quality components. That’s why it’s worth investing in a good-quality starter kit from a reputable manufacturer. A higher quality kit may cost a bit more, but it will save you time and frustration in the long run.
Overall, an Arduino starter kit is a smart investment for anyone who’s serious about learning about the platform. It provides you with everything you need to start experimenting and learning, and can help you get up to speed quickly and easily. However, if you don’t have the means of purchasing a kit right now a great free alternative is to use an Arduino simulator like Tinkercad which we go into detail explaining how to use in our Free Arduino Mini-Course.
Step 3: Installing the Arduino IDE
To program your Arduino board, you need to download the Arduino IDE – a free software tool that lets you write and upload code to your board. The IDE is available for Windows, Mac, and Linux and is easy to install.
Simply go to the Arduino website and download the appropriate version for your operating system. Then follow the on-screen instructions, which will guide you through the quick and simple installation process.
Once you’ve installed the IDE, connect your Arduino board to your computer using the USB cable from your starter kit. From the Tools menu in the IDE, select the correct board and port, and you’re ready to start coding!
Step 4: Learning the Arduino Programming Language
Programming is an essential part of using Arduino. Fortunately, you don’t need to be an expert in coding to get started. With the right resources and a bit of patience, you can learn the basics of the Arduino programming language and start creating your own projects.
The programming language used by Arduino is based on C++, a popular language for programming microcontrollers. If you’re new to programming, don’t worry. There are plenty of free online resources to help you get started, including video tutorials, online courses, and books.
The official Arduino website is an excellent place to start your learning journey. It offers a range of tutorials, examples, and documentation to help you understand the basics of the programming language. You can also connect with the community and get help from the forum.
Step 5: Writing and Uploading Your Code
Now that you have learned the basics of the Arduino programming language and installed the Arduino IDE, it’s time to start writing and uploading your code to the board.
Don’t worry if you’re new to coding, the Arduino programming language is user-friendly and easy to learn. Start with a simple project, like turning on an LED, and build your way up to more complex projects.
To get started, open the Arduino IDE and create a new sketch. Refer to the documentation for your board and components while writing your code. You can also find a wealth of resources online, including Arduino tutorials and examples that you can use as a guide.
Once you have written your code, you can upload it to the board by clicking the “Upload” button in the IDE. With practice, you’ll become more comfortable with the programming language and develop the skills you need to bring your projects to life. So don’t be afraid to experiment and try new things.
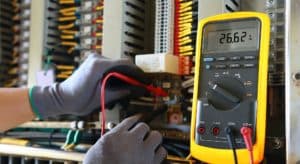
Step 6: Testing and Debugging Your Code
Testing and debugging your code is an essential part of ensuring that your Arduino project functions as intended.
Here are some helpful tips to make the process easier:
Use the Serial Monitor to print messages and values for debugging.
Use LEDs and other components to test and observe behavior.
Add comments to make it easier to understand and debug your code.
Break your code into smaller parts to isolate problems.
Refer to online resources and forums for help and advice.
Debugging can be challenging, but with practice, you’ll become better at identifying and fixing issues in your code. By testing and debugging thoroughly, you can ensure that your projects work as intended and avoid frustration down the line.
Step 7: Creating Exciting Projects with Arduino
With the knowledge and skills gained from the previous steps, you’re ready to start exploring the endless possibilities of Arduino projects. Here are just a few project ideas to get you started:
Home Automation: Automate various home devices, like lighting, temperature control, or security systems, using Arduino and sensors.
Robotics: Create robots that can navigate and interact with the environment using sensors, motors, and controllers.
Wearable Technology: Design wearable electronics, like smartwatches, fitness trackers, or biometric sensors, using Arduino.
Gaming: Build interactive games and toys that respond to user input, like buttons or sensors, using Arduino and displays.
Music and Art: Create musical instruments, sound installations, light shows, or interactive art installations using Arduino and various sensors.
These are just a few examples, and the possibilities are endless. Use your creativity and apply the knowledge gained to build exciting, unique projects. You can also collaborate with other Arduino enthusiasts and share your projects on online communities and forums. So, get started and explore the world of Arduino!
Free Arduino Mini-Course
If you find yourself struggling with any of the steps outlined above or want a structured and guided approach to learning Arduino, consider signing up for our Free Arduino Mini-Course. The course takes you step-by-step through all the steps outlined in this post with 2 hours of video content, 30 lessons, 4 step-by-step example projects, 3 challenge projects, and a final project to put everything you learnt together.
Our Mini-Course is designed to help you learn Arduino in a fun and engaging way, with beginner friendly explanations. It’s completely free, and you’ll receive helpful resources and support from our community. Sign up today and start creating your own exciting projects with Arduino.
Join our Tech Tribe Community and be the first to learn important global tech news and improve your skills in engineering/robotics/3D printing, and more. Continue to quickly learn all the knowledge you need for DIY electronics or your college program with our Learning Hub.


")